New Infantry Guide
Views
Actions
Namespaces
Variants
Tools
Welcome to the new infantryman's guide to surviving the coalition session. The purpose of this guide is to introduce you to how the community of Coalition conducts warfare and what you need to know before the bullets start flying, rather than what the US military does in the real world. While our tactics, techniques, and procedures sometimes match and greatly pull from our real-world counterparts, it would be silly to teach you real-world tactics for a virtual environment like some "super-milsim" group.
With that in mind, take this guide seriously as you'll be expected to know and perform techniques written here in real time during sessions.
The Basics
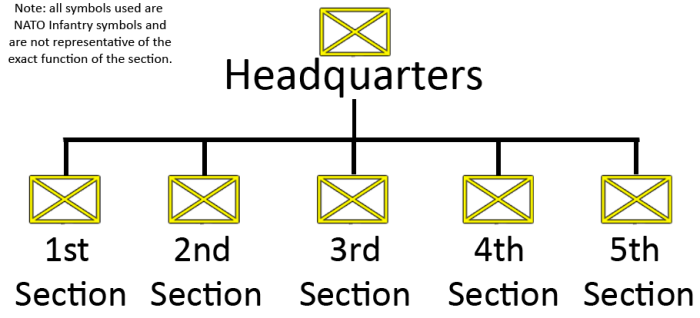
Company Structure
DESIGN AND IMPLEMENTATION
Each section consists of two fire teams. Each fire team consists of at least four troops:
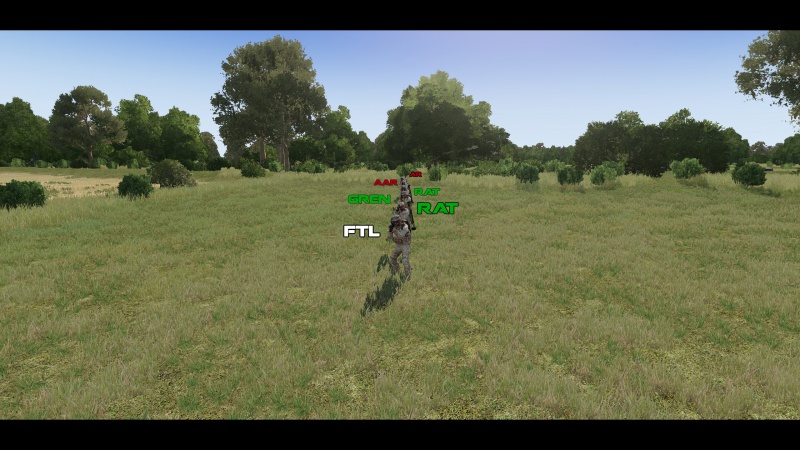
FTL - Fireteam Leader
AR - Automatic Rifleman (Second in command)
AAR - Assistant Automatic Rifleman
GREN - Grenadier
RAT - Rifleman Anti-tank
Fireteam Structure & Roles
There are five roles in each fire team that you must know:
FTL - Fireteam Leader
This man is your direct line leader. All orders will stem from him. Always stay tactically near him.
- Loadout:
- Rifle with M203/M320 or GP25 GL
- Binoculars
- Short-range AN/PRC-343 Radio
- Long-range AN/PRC-148 Radio (if using Fireteam Nets)
- Loadout:
AR - Automatic Rifleman
- The AR is the second in command and in charge of the first color team. If you're an AAR, stay with him.
- Loadout:
- Automatic Rifle or LMG
- Pistol
- Short-range radio (Squad Net)
AAR - Assistant Automatic Rifleman
- The AAR's job is to spot for the AR, adjust his fire, and ensure he maintains a healthy amount of ammunition when possible.
- Loadout:
- Rifle or Carbine
- Binoculars
- Short-range radio (Squad Net)
GREN - Grenadier
- The GREN's job is to serve as a maneuver rifleman with the added ability to lay extra indirect fire on to enemy positions. He is the second color team leader.
- Loadout:
- Rifle with M203/M320 or GP25 GL
- Extra grenades
- Short-range radio (Squad Net)
RAT - Rifleman Anti-tank
- The RAT's job is to serve as a generally room-clearing or maneuver rifleman as well as destroy any armored assets the fire team may encounter. Stay near your GREN when possible.
- Loadout:
- Rifle or Carbine
- Single-use anti-tank launcher
- Short-range radio (Squad Net)
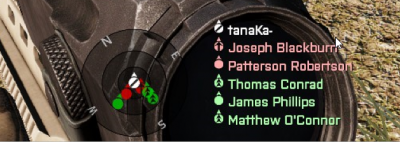
A Coalition fireteam is broken down into two color teams, each with their own purpose:
RED TEAM - AR, AAR
GREEN TEAM - FTL, GREN, RAT
If in a second team like Alpha 2/Bravo 2/Charlie 2, team colors are BLUE and YELLOW respectively to avoid radio mix-ups.
Red team serves as a base-of-fire (BOF) team with the FTL, AR, and AAR. The combination of an underbarrelled grenade launcher, light machine gun (LMG), and two sets of binoculars enables red team to provide command and cover to green team in a multitude of environments.
Green team serves as a maneuver element within the fire team. Their job is to clear buildings, flank if pinned, and generally destroy any vehicle threats that may happen upon the fire team.
A competent fire team leader will combine both teams efficiently to ensure they work together across multiple types of terrain.
Role Limitations
While as a recruit during your first couple weeks in the community, you will not be able to take the Fireteam Leader (FTL) or Automatic Rifleman (AR) roles so that you can learn how to be a fireteam member before leading one.
Formations & Spacing
There are a total of three formations you need to know:
By default, we use the wedge as a movement-to-contact formation. This formation allows for the maximum firepower forward and to
the rear if need-be, but suffers from a large cross-section from the sides.
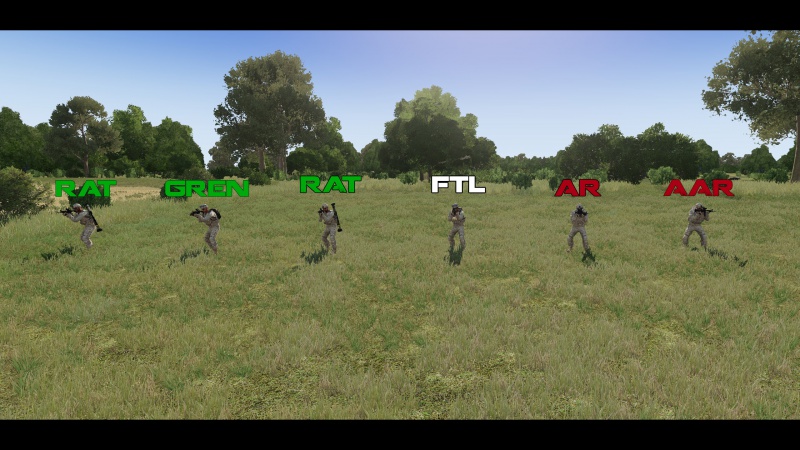
THE LINE
click for larger picture
Not to be confused with the column, the line is commonly used as a reaction to contact from the wedge to get maximum fire power
forward. It is also used in forests or dense terrain.
THE COLUMN
click for larger picture
The column is used when traversing dangerous obstacles like minefields or when visual signature needs to be as low as possible.
Has great fire support to the flanks, but lacks in the rear and forward. Notice red team is in the rear in order to provide
maximum support.
Each formation consists of a minimum of 5 meters of spacing as displayed in the pictures above.
Your team leader will always instruct you to "push out" or "pull in" while moving in formation and you can utilize your STUI compass to help control spacing.
Radios
We utilize a mod called Advanced Combat Radio Environment, or "ACRE2" for short, to communicate while in game. This uses your normal push-to-talk key in teamspeak to transmit your voice into a 3D environment. It also adds new radio items to communicate long distances. A brief guide can be found here, but don't look to deep into it. You will automatically be assigned a radio per mission and it will be setup to be on your fire teams frequency from the start.
Fireteam Nets vs Squad Nets
We use two radio structures: Fireteam Nets and Squad Nets. This is dependent on mission design.
Fireteam Nets
What we use most often right now. Each individual fireteam, (A1, A2, B1, B2, etc) has their own channel on the AN/PRC-343 (e.g., A1 on Channel 1, A2 on Channel 2, B1 on Channel 3, etc). Each fireteam leader will have two radios: the short-range AN/PRC-343 for communicating with their own fireteam, and the long-range AN/PRC-148 for communicating with the squad leader and the FTL for the other fireteam (AN/PRC-148 will be set to Channel 1 for Alpha Squad, Channel 2 for Bravo Squad, etc). The squad leader himself will have two long-range radios to communicate with other squads and the platoon leader on the Platoon Net channel (either two AN/PRC-148s, or one AN/PRC-148 and one AN/PRC-152. All long-range radios will use the same channel frequencies).
It should be kept in mind that non-leadership personnel will have no direct radio communication with their squad leader. Medical personnel are also not guaranteed to be listening on your short range channel. If you need to contact the squad leader or request medical assistance, do so through your fireteam leader. This also makes recovering the long-range radio from a downed fireteam leader essential.
Squad Nets
Not used as often, but can occur in certain missions. The entire squad will be on a single AN/PRC-343 channel (Alpha on Channel 1, Bravo on Channel 2, etc). Squad leaders will still retain a long-range radio for communicating with other squads and the Platoon leader.
Minimizing radio chatter becomes very important, as many more people will be using a single net, and the channel may quickly become clogged with radio traffic. Clarifying the identity of yourself when transmitting the bearing for a callout is also important as fireteams may be located far from each other.
Communicating
One of the best things you can do as a new infantryman is learn to communicate with your other fire team members. Regardless of roles, know when to and when not to speak on the fireteam radio to ensure maximum information flow reaches the right ears. Some guidelines:
- Always state your name when speaking on the radio. Avoid words like "me" and "I".
- Use the "ADD" report when calling contact on the radio - Alert, Direction, Distance
- Example: Green team contact, two EI at that tree line bearing 252, 300 meters
- Stay with your color team at all times. This allows you to simply speak to them.
Medical
For a more in-depth writeup of medical click here.
Self-aid
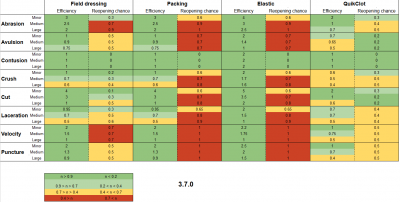
If injured in the field, press the "H" hotkey to bring up your medical menu. Immediately begin by clicking on the injured/colored limb and diagnosing the damage on the right sub menu. Utilize your basic medical items (2 elastic bandages/2 packing bandages/1 tourniquet) to stop any bleeding you may have. A list of injuries and bandage effectiveness can be seen to the right.
If you are in pain, have a broken bone, hear your heart beat, or have lost a substantial amount of blood, inform your leadership that you require a medic ASAP. Failure to do so can result in you going unconscious and being killed by cardiac arrest.
Likewise if you have been shot in the chest you should always check your chest wounds for a Pneumothorax aka a "sucking chest wound". There are 3 types and all of them require a medic immediately! You should alert your team so they can ensure you do not pass out and drown in your own blood before the medic arrives. If you have access to a chest seal go ahead and apply one. But you still need to see a medic for full treatment!
Otherwise once your bleeding has stopped, you have fluids in you, and all tourniquets are removed, it is safe to continue fighting.
NOTE: "Stable" means no bleeding/has fluids/has stable heart rate. Just because you're limbs are bandaged does not mean you are stable!
The Advanced
Movement Orders
Occasionally, your team leader may order you to do specific movements that you will need to know.
Bounding
Pictures TBA
Peeling
Pictures TBA
Playing AAR
The AAR is the second man behind the LMG. His task is to support the Automatic Rifleman in the employment of his gun and protect him during its employment. While moving, you should stick directly with your color team member - who is the AR - at all times.
- Your tasks include:
- Spotting targets and observing bullet impact using the Binoculars
- Carrying spare ammunition for the gun to sustain its fire
- Watching the ARs flanks while he employs the gun due to his natural inclination to tunnel vision
Playing RAT
The Rifleman (Anti-Tank) is our primary means of defense against enemy armored vehicles. You are the fire teams, and often the whole platoons only anti-tank asset. Thus, your armament and your proficiency with it can make the difference between your whole team dying - or not. While moving, stay with the second color team member - the grenadier - at all times.
- Your tasks include:
- Range estimation to target
- Correct handling of our common launchers, manuals for which can be found here.
- Patience to ensure a hit
Playing GREN
The Grenadiers weapon is the grenade launcher, most commonly fixed under the barrel. With it, he can use both HE grenades to fight enemies behind cover, in ditches or in windows and smoke grenades to conceal his teams movement. You are the second color team leader while moving.
- Your tasks include:
- Range estimation to target
- Employing the HE grenades with precision
- Knowing when and how to employ smoke
- IE: Never smoke your own position unless you are retreating. Smoke the enemies position or the path to the enemies position instead. Avoid placing smokes in a way that you have to run through your own smoke.
